Monday, April 14, 2014

Progress Over Perfection

When you start a journey to better health, it is really hard not to get caught up in what I like to call "Instant Gratification Syndrome" for example... I started eating better yesterday but the scale did not move this morning or I started lifting weights but why do I not see any muscle definition. We live in a society where everyone wants results NOW and some get frustrated when the results of working hard towards a goal are not instantaneous. Great things take time and as hard as it may be to practice patience, it will be worth it, I promise.

I posted this progress picture the other day to show what 3+ years of training, dieting, and hard freaking work has enabled me to do with my physique. I am sharing it with y'all, encouraging you to never give up on your goals! Goal setting can be tricky. If the goal appears too big, you may find yourself feeling defeated before even trying to achieve it or if you find yourself stumbling and taking a couple steps backwards, you might feel disappointed and talk down to yourself. Whatever goal you are working towards, know that YOU can accomplish anything you set your mind too. Here are the top goal-setting principles that I personally like to follow to keep my self striving for progress, not perfection.

  • Write it down! Write down your top 5 goals that you can repeat from memory. Listing more than this may cause you to feel overwhelmed and lose focus so starting with the top goals that you want to work towards helps you stay focused. Also, by writing out your goals, it is like proclaiming your intent and setting your plan into action.
  • Keep goals "S-M-A-R-T". Specific- identify exactly what you want to do and be as specific as possible. This allows you to create a game plan and identify the necessary steps to take to reach your target. Measurable- If you can't measure it, how are you going to manage it? For example, maybe your goal is to start weight lifting, instead of saying "I am going to start weightlifting this month" say "I am going to weight lift 2 times a week this month". This gives you a definitive answer if you reached your target or not. Achievable- Construct and set a goal that you know can be achieved. Goals should be reasonable but also a stretch to push you. Realistic- Adding on to the previous letter, goals should be challenging but attainable given your abilities and skill set. Timely- Set a time frame for you goal that allows you to really work hard and focus on what you are trying to achieve. For example "Losing 10 pounds" is a great goal to have but a time-bound goal "Losing 10 pounds by October 1st" gives you a deadline to achieve your goal by. 
  •  Share your goals! Selectively sharing your goals with those you trust and who are on board to help you achieve them is a great way to stay accountable and seek encouragement. They can help push and encourage you but do be careful who you share with. I have learned not to share with those who are un-supportive of my goals.
  • The biggest thing I have to remind myself is to leave room for failure and to not expect perfection. Persistence is key! Accept the fact that you might not make it on the first try but never let it get you down. It is a journey that you should take great pride in and little failures along the way will only make you stronger if you continue to push forward and learn from them. 
No matter the goal, you have the power within yourself to achieve it! Be patient. Be persistent. Be positive about your goals and most importantly, believe in the power of YOU. I do!

While shopping in the sunshine this weekend, I couldn't help but notice the abundant colors of fresh fruit. The reds, greens, purples, yellows, blues!  I wanted to create a very simple but delicious treat that would be great served fresh or frozen. 


Take care of you!

J

Friday, April 11, 2014

Killer Plyometric Workout

WINNER WINNER! Congratulations to Stacy who just won my Quest Bar Giveaway! You have a bundle of 5 bars coming your way!! :)

Welcome to Friday folks! This weekend I am going to start incorporating more HIIT training into my regimen (hopefully you will too!) In the spring and summer months when it is lighter earlier and the weather is nicer, I love going to the local track and completing a sprint workout early on a Saturday morning or I will finish my morning lift with plyometric training. I really like plyos because they are challenging, force me to work outside my comfort zone and provide a solid workout that my body is not accustomed to doing. 


Plyometrics aka plyos or “jump training” is a form of training that requires the muscles to exert force in a short period of time to increase speed, power, and overall explosiveness. Many athletic programs especially sports such as the high jump, basketball and volleyball use this type of training in the off season to develop the previously mentioned goals.

Plyo’s are a great conditioning tool that rapidly stretches the muscles (eccentrically) before rapidly shortening the muscles (concentrically). For example, jumping causes the quads to undergo the stretch-shortening (eccentric-concentric ) cycle which can help develop and strengthen those muscles involved in the movements. Not only are plyo’s beneficial for your muscles but also your tendons, bones, and nervous system! So get to jumpin.

With any workout program, make sure you are healthy and able to start a regimen and always check with a doctor if you need. When it comes to plyometrics, there are some precautions to take before jumping on board. Plyometrics are intense. You will be putting a lot of load on your muscles, joints and tendons so take it easy at first and make sure you have built up your strength and flexibility first through weight training. Focus on performing the exercises in a controlled manner and get used to the movement before you go “balls to the wall”. Definitely do not want anyone injuring themselves! Always warm up before any training session and allow yourself to rest in between plyometric workouts, just as you would between weight lifting sessions. I usually incorporate plyos in once maybe twice a week for my conditioning. When it comes to sets and reps, go at your own pace and know your limits. Typically, I shoot for 3 sets of 15-20 reps and cycle through exercises. I will rest for about a minute between sets or a little bit longer if I need.

Here are my favorite plyometric exercises and since I am ready to get after it, this is what my workout will look like tomorrow morning!

  1. Box jumps- Stand facing a secure box or bench. Jump onto the box and immediately jump back down into the starting position. Repeat.
  2. Skaters- Cross your left leg behind your right leg as you bend your right knee into a half-squat position (just like a speed skater would). Extend your right arm out to the side, and swing your left arm across your hips. Hop a few feet directly to the right, switching the position of your legs and arms. That's one rep. Continue hopping from side to side without pausing.
  3. Plank Shuffle- Start in the Pushup position. Place left hand on top of a medicine ball with your right hand on the floor (as if you were going to perform a pushup). Keeping your back flat and core tight, push your upper body up so that your right hand is now on top of the medicine ball and your left hand is on the floor. Immediately shift your upper body back to the original side and continue to repeat. **picture from menshealthmag.com
  4. Split Jumps-Stand with your feet in lunge position (staggered stance) with your left foot in front of your right. Lower your body into the lunge. Quickly jump up and scissor-kick your legs so that you land with your right leg forward. As soon as your feet land, lower your body into a lunge. That's one rep. **picture from womenshealthmag.com 
  5. Lateral Box Hops- Stand with feet on either side of a low bench or box. Squat down, then explode off the ground, landing in a squat with both feet on the step and knees slightly bent on top of the bench. Hop back down into a squat with feet on either side of the bench. Repeat.  **picture from womenshealthmag.com 
  6. Jump rope- I like to finish off with jump roping because it is an awesome cardiovascular tool! Have you ever noticed how little kids can go forever?! I will perform 30 sec slow with 30 sec fast then switch to 30 seconds hopping on my right leg and switch to 30 seconds on my left leg. Be creative and have fun with your jump rope! It really is a killer workout!
Recently my hubby and I went to a Mexican restaurant and I was really craving nachos but if you are wondering….No I did not order them but it did give me the idea to make my own using sweet potato chips and that is what we are having paired with lightened up margaritas for Saturday night! J


Have a great weekend y'all!

J

Thursday, April 10, 2014

Non-meat Protein Sources

While visiting my closest girlfriend in Utah, I altered my intake of protein to include sources that were primarily non-meat based versus almost every meal including some sort of meat. It is a lot easier than you might think and is actually be quite tasty. I am sure you have heard the term “meatless Mondays” well I am making this a “meatless Thursday” because… well why not?  I like going against the norm. J


There are several non-meat sources of protein and I have created a list of seven that I tend to eat the most of. 


Lentils- These bad boys contain 18 g protein per 1 cup and are high in iron, potassium and folate. They are great when used in stews, soups, salads, and dips. They come in dried and canned form and are easily prepared by boiling them in water using a 3:1 ratio… 3 cups water for every cup lentil.

Tempah- Tempah is made from fermented soybeans, packing around 22 g protein per cup. Tempah is a lot like tofu but a little chewier and has a nutty flavor perfect for baking, steaming and adding to a stir-fry. Tempah, like tofu, needs to be stored in the fridge but can last if you put in the freezer for up to 6 months. It is easy to prepare and takes about 20 minutes to cook, depending on the brand you are using.

Chickpeas- One cup of these delicious nuggets contains 12 g protein. They are fabulous when ground into hummus, thrown into salads, or used as a topping for any side dish. They are easy to prepare and I always rinse them before adding to any dish.

Beans- Beans, beans the magical fruit… You know the rest ;) Providing about 15 g of protein per cup, these legumes are full of protein, fiber, and magnesium and are low in cholesterol! I use beans in soups, salads, dips or in a sweet potato veggie burger. They come in dried (think bulk food section!) or canned version and are prepared by soaking overnight (dry form) before adding to your recipe.

Broccoli- This green tree provides 4 g protein per cup and is delicious in its raw form. If you aren’t a fan of raw broccoli, it is great when steamed, sautéed with garlic, or chopped and added to any dip. It is always best to rinse your produce before consuming and can be stored in the produce drawer of your fridge.

Spinach- I LOVE spinach. I love it so much that I eat it with pretty much every meal. Not only is it packed with vitamins and minerals, one cup has about 7 grams of protein! It is great added in salad, stir fry, eggs, and smoothies. An added bonus… You can get a big tub of organic spinach at Costco for about $4.00!

Hemp Seeds- I just tried these for the first time while in Utah and I love them! They have the texture of sesame seeds but are nuttier and delicious! Three tablespoons has around 10 grams of protein and they can be purchased at the grocery store or natural health food store. They are great additives to your morning oatmeal, smoothies, salads, dips, or any dish really.

There are several more alternatives (another post WILL be coming) that provide excellent sources of protein and they are from non-meat sources; which if you choose to eat a diet that is primarily sans meat, have no fear, you can easily get enough protein to build muscle!


By now, you are starting to learn what I love and when I say love, I mean L-O-V-E! I am declaring my love for chocolate right here and now. When I was working on my Bachelors in nutrition in college, we were required to take a cooking class that used healthy modifications to popular recipes. One I will never forget is the Black Bean Brownie… Yep that is right, you use black beans and make brownies. They are quite good and are a healthy alternative to one of my favorite desserts! 


Take care of you!

J

Wednesday, April 9, 2014

Saving Some Green While Eating Clean


 I often hear people say that they would like to eat clean or eat healthier but it is too expensive and their grocery bill becomes too much for their budget. Sorry to be the bearer of bad news but a medical bill from poor health is going to cost much more than making changes of what you put in your grocery cart. It is possible to save a little green while eating clean and here are some tips and tricks that I use when filling the fridge.

One word. Bulk foods. This will save you A LOT of money when it comes to grains, beans, nuts, seeds and spices. As you start to build up your bulk food supply, you will find that you are shopping and spending less on the essentials. I typically stock up on old-fashioned oats (I have even found a store with gluten free!), long-grain brown rice, quinoa, black beans, and several spices. Storing your bulk supplies in glass jars keeps them fresh and even adds some display beauty to your cupboards.

Organic selection. Only some fruits and veggies are necessary to buy in the organic section, so no need to sweat if you aren’t solely shopping 100% organic. You can look at my previous post for items to buy organically or the App store actually has an app (Dirty Dozen) that lists produce items with the most pesticides (ones you will want to purchase as organic) and which items are safe to buy from the non-organic section. 


Farmers Markets (my FAVORITE). I love LOVE farmers markets and produce stands! There is a wonderful one in my area that I purchase a majority of our produce from during the summer months. Almost all produce (items in season) will cost less at the Farmers Market when compared to the grocery store and an added bonus is shopping local to support our communities! Selecting items that are in season is a BIG MUST when trying to save money. For example, I just saw an ad for asparagus that was $0.98/lb which is a steal but out of season… I have seen it as much as $6.98/lb! Wowza that is crazy.

Coupons, coupons, coupons! Coupon clipping may seem time consuming but it can also save a lot of money. The weekly ad always arrives on Wednesdays at our house which gives me a couple days to map out the big shopping trip on the weekend. Planning and couponing go hand and hand and can save you big. When you have a plan for a week of meals, you not only stick to your list in the store but you can also see what you already have (versus buying it because you can’t remember) and you can see if your items are on sale.

Be creative. Purchasing and cooking a whole chicken is much more cost efficient than just the breasts however, you may have to be creative with your leftovers! This is where you get to have some fun. Most times if I know I have leftover quinoa already cooked, I look through the cupboards and come up with a random recipe. Eating your leftovers may not be your favorite, but jazzing them up with ingredients you have on hand not only reduces food waste but saves you time and money in the kitchen.

My husband always calls me “The creative queen” when it comes to dinner because I really do just throw stuff together and expect him to eat it! J Last night I was tired and did not want to put effort into dinner so I took quinoa I had cooked on Sunday and added some ingredients to make a dish I am actually quite impressed with!


Tuesday, April 8, 2014

Resistance Training Types


When it comes to resistance training, there is not a “one size fits all” training method. Of course there are guidelines in addition to your individual goals that you can use to create your routines but where do you begin? What does it mean to train for muscular strength versus muscular hypertrophy versus muscular endurance? Which training method best targets your goals?

Let’s start by examining the difference between the methods I just mentioned. Please remember everyone is different and this post provides general information. I encourage you to seek advice from a trainer if you are just getting involved in strength training or have any questions.  With that being said, muscular endurance is a great starting point for any of you that are very new to weight training.

Endurance training focuses on ‘lighter weights for more repetitions’, aiming to complete 12 or more repetitions over 3 sets. Rest periods are short, ranging 30-60 seconds between sets. For example, performing 3 sets of 20 leg extensions using a lighter weight might be included in an endurance program. Although the amount of weight lifted is considered lighter (compared to strength and hypertrophy training), you still want to use a weight that challenges you on your last 2-3 repetitions. If you finish your 20 repetitions and feel like you could keep going for another 5 or more, it is time to increase your weight. Endurance training is commonly used among endurance athletes such as distance runners and usually involves total body workouts.

Hypertrophy… You might be thinking hyper-what? Muscular hypertrophy is an increase in the size of skeletal muscle by an increase in the size of its cells via sarcoplasmic and myofibillar hypertrophy. In other words, hypertrophy is an increase in muscle mass and cross-sectional area. Increasing your lean muscle mass improves strength and stamina, helps manage insulin sensitivity, increases your basal (resting) metabolic rate, and can aid in body fat reduction. Training for hypertrophy includes 3-5 sets of 8-12 repetitions, resting anywhere from 1-3 minutes between sets. When training for hypertrophy the weight selected should leave you feeling fatigued by the end of your set ie it is challenging to complete your last couple repetitions. Hypertrophy training programs are commonly split up, so you are focusing on one to two muscle groups per training session (again, this is a guideline). This type of programming allows sufficient recovery time and allows you to train more days of the week.


When training for muscular strength, the goal is to lift a heavy weight for only a few reps (few meaning 6 or less). Strength programs are widely used among athletes and individuals who want to increase their strength. I personally like lifting heavy and pushing myself to lift heavier each training session. When programming for strength, a typical training session involves performing 3-6 repetitions (this will greatly vary, for example if you are performing a 1 RM, it is just one) and 3-5 sets. The weight that’s selected generally is a percentage of the 1 RM but it should be heavy enough that set is challenging while keeping good form. Rest can vary anywhere from 3-5 minutes (maybe even more) but should allow for recovery before performing the next set. It is always a good idea to use a spotter when lifting heavy and practice good form with any program!  **Power is also an area of resistance training utilizing explosive lifts and difficult techniques, and I will touch on this one at a later time.
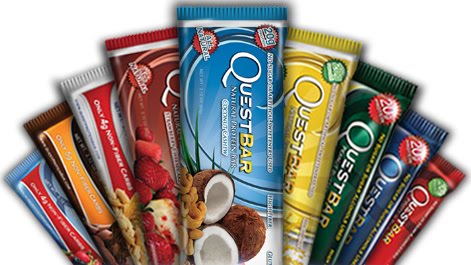

I love giveaways, especially when I WIN!! J I also love sharing things that I love because I get pretty dang excited for others to try them!  I have been asked a few times where to purchase Quest Bars after I posted them in Friday Favorites.  SOOOOOO… I am giving away a bundle of 5 Quest Bars! Here is how to enter the drawing…


  • Answer the following question... What is your favorite outdoor physical activity?? 
  • Comment on this post with your answer
  • Winner will be randomly selected and announced in Fridays post 


Take care of you!

J

Monday, April 7, 2014

Travel Tips For Success


Happy Monday! I am sorry for the lack of posts last week, I was traveling to and from Utah to spend time with a very dear friend and her family. When I travel, I usually pack my 6 pack cooler (one of my favorite accessories ever) with all my meals for that day in addition to the items I will need during my trip. Since I knew I would be able to prepare healthy meals while visiting, I did not pack anything but protein pancakes for breakfast. On my trip down, it was a very early morning! My shuttle left at 3:30 am and my flight departed at 6 am. One thing I noticed while at the airport was the amount of individuals who chose (that is right....CHOSE) to eat at McDonalds at 5:00 in the morning. The thought of a sausage breakfast sandwich with a fake egg looking substance and a chunk of deep fried hash browns makes my stomach turn.


After watching person after person order, I got the urge to scour the airport for healthier breakfast options (well and I get bored if I sit too long!) I was actually surprised by what I found, even in a short distance from the long line at the golden M. In about 5 minutes, I found several grab & go items that would make for fantastic options while traveling and help keep you and your goals on track.

  • Oatmeal- The Starbucks, Seattle's Best Coffee, and the Cafe Fresh all had oatmeal options available for $2.45. This would make a great choice for a quick breakfast on the go and they offer fruit and nut add-ins if you are interested. I purchased one and mixed in a scoop of my protein powder on my flight back to keep me full and also on track.
  • Hard-boiled eggs- The Cafe Fresh and the Seattle's best coffee had a two pack of hard-boiled eggs available which would be a great snack or addition to your oatmeal. Hard boiled eggs whites are a great source of protein and a healthy fat if you eat the yolk. 
  • Greek Yogurt- Greek Yogurt was harder to find compared to the yogurt parfaits (sugary yogurt layered with granola) but it was not impossible! I found a variety (5 flavors) of Chobani 0% Greek yogurt. Greek yogurt (depending on the flavor) has less sugar, more protein and a thicker consistency than regular yogurt.
  • Fruits and vegetables- Most shops offered several fruit options including bananas, apples, oranges and grapes and a vegetable cup containing celery and carrot sticks. One shop even offered hummus with the vegetables. Hummus is a great alternative to dressing offering less calories and fats per tablespoon.
  • Salads- The salads looked fairly decent considering and offered choices such as Greek, Caesar, Chef, and Garden. With out adding the dressings or using lemon wedges or a DRIZZLE of a vinaigrette, this would be a great item to munch on while waiting for your plane. 
  • Protein Bar- I was surprised by the bars that I found in the shops. I found a gluten-free, gmo-free, dark chocolate protein bar that offered 20 g protein, 4 grams of fat and 215 calories. They were spendy but would be a quick fix in a pinch. Bars are my last option when I am on the go because many are filled with additives and I enjoy good whole foods over bars any day.
  • Nuts- I found several nut varieties including raw almonds, raw almonds with pumpkin seeds, unsalted cashews, almonds and cranberries in addition to walnuts and dried blueberries. Nuts provide healthy fats and good energy but just be careful when eating them for they offer 9 calories per gram where as carbohydrates and proteins offer 4 calories per gram. In other words, a little goes a long ways. 
  • Restaurants- If you have a longer wait in the airport, many of the menus that I looked at offered items that with a little tweaking, would be great choices while traveling. I found grilled chicken and vegetables, a veggie omelette that came with an all egg-white option, grilled fish tacos with pico de gallo, a whole wheat turkey wrap with no sauce, and a grilled salmon Caesar salad (ask for dressing and cheese on the side). 

When in doubt, always try to chose nutritious whole foods and never be afraid to ask what is in your food.

I often get asked how I prepare my fish partially because some do not like fish and some do not have much experience cooking fish. One of my go to methods for cooking fish is on the grill. Depending on the type of fish, I will use the BBQ but with white fish I usually use George foreman. It does not take to long to cook and turns out pretty darn good every time!


Tuesday, April 1, 2014

Say No To GMO's...Part One


Sorry for the lack of post yesterday, it has been a busy week already and it is only Tuesday! I really want to talk about GMO’s, genetically modified organisms, because it is a term that is discussed every single day and some may have heard about GMO’s but maybe you’re unsure what the term really means or what you should watch out for.


To start, genetically modified organisms are organisms (or micro-organisms) such as bacteria, yeast, insects, plants, fish and mammals whose genetic makeup has been altered using engineering techniques. The techniques used include inserting, deleting, or mutating the genes of the organism in order to alter or change the species entirely.  For example, DNA from one organism can be extracted and merged with the DNA of a different organism to create an entirely new species. This is widely performed in medical research and experimentation, production of pharmaceutical drugs, and agricultural production.  

Agricultural products are categorized into two groups: (A) those that are high-risk of being GMO because they are in commercial production and (B) organisms that have a supervised risk because they may have come in contact or contaminated with genetically modified relatives. High-risk crops include: corn, papaya, soy, sugar beets, zucchini, summer squash, canola, and alfalfa. Supervised or monitored-risk crops include: flax, wheat, rice, chard, acorn squash, turnip, bok choy, and table beets. There are several ingredients that are derived from GMO risk crops including but not limited to: Aspartame, Ascorbic Acid, Sodium Ascorbate, Vitamin C, Citric Acid, Sodium Citrate, Ethanol, Flavorings (“natural” and “artificial”), High-Fructose Corn Syrup, Hydrolyzed Vegetable Protein, Lactic Acid, Maltodextrins, Molasses, Monosodium Glutamate, Sucrose, Textured Vegetable Protein (TVP), Xanthan Gum. So what does this mean?


GMO’s are engineered to be herbicide tolerant, designed to survive applications of weed killer such as roundup. For instance “between the years of 1996 to 2008, US farmers sprayed an extra 383 million pounds of herbicide on GMO crops” (responsible technology.org). A larger amount applied not only harms the environment but the crops also have a higher residue of herbicides, in which some have been linked to hormone issues, infertility, birth defects and even cancer. Some human studies have shown that GMO’s actually leave a residue in the body, possibly causing health problems. Gross right? Well some animal studies have shown that there is organ damage, immune system disorders and accelerated aging related to GMO food consumption. So what do you do?

Avoid GMO foods! There are several ways to keep your diet GMO free including: buying organic foods because the USDA National Organic Standards prohibit GMO’s and plus organic foods have little to no pesticides and herbicides. Look for the non-GMO seal, which is tough to find because there is no requirement to label GMO foods. Most companies actually will not tell people what is really in their foods! Say no to “at-risk” ingredients and additives such as soybeans, canola, cottonseed, corn and sugar from sugar beets, which are the highest risk GMO’s.

When I first started researching GMO’s, I got really overwhelmed! But … Do not fear I am here to help you. There is a lot of information out there and I will continue adding to this post to keep you informed and provide you with ways to avoid GMOs.


My parents just spent some time in Hawaii and they brought back a ton of macadamia nuts! They are sooo sooo good but definitely need to keep them in check when eating them! Lol So this recipe is GMO free and Hawaii inspired J


Take care of you!

J